image to video ai generator: Turn photos into videos
An image-to-video AI generator isn't just about adding a little shimmer to a static picture. These tools, especially the newer Sora-style models, are fundamentally changing the game. They look at your image, listen to your text prompts, and then build a video around it—creating fluid motion, camera pans, and entire narratives from a single, still photo. For anyone creating content for social media or marketing, this is huge. It means you no longer need a film crew or complex editing softwa
An image-to-video AI generator isn't just about adding a little shimmer to a static picture. These tools, especially the newer Sora-style models, are fundamentally changing the game. They look at your image, listen to your text prompts, and then build a video around it—creating fluid motion, camera pans, and entire narratives from a single, still photo.
For anyone creating content for social media or marketing, this is huge. It means you no longer need a film crew or complex editing software to make something that truly grabs attention.
The New Era of AI Video Content Creation
We've officially entered a new frontier in content creation, where the line between a photograph and a video is getting blurrier by the day. The emergence of powerful image-to-video AI generators has completely shaken up how marketers, small business owners, and creators can produce professional-looking video.
Honestly, it's a massive shift. High-quality video production used to be reserved for those with deep pockets and serious technical chops. Now, you can take a simple product photo from your phone and turn it into a slick, dynamic ad for your Shopify store or a viral-worthy clip for TikTok.
This goes way beyond the simple animation filters we've seen before. These AI models aren't just overlaying basic effects; they're building a three-dimensional understanding of your image. They figure out the depth, separate the subject from the background, and even generate brand-new pixels to make the movement look real.
From Still Image to Living Scene
So, how does it actually work? It all comes down to generative video. The AI takes your source image and your text prompt and puts them together to figure out what you want.
Let's say you upload a picture of a calm lake and give it the prompt, "gentle ripples moving across the water with a slow pan to the right." The AI gets to work. It will:
- Figure out the water is the part that needs to move.
- Generate ripples that look natural.
- Simulate a smooth camera pan, essentially creating parts of the scene that didn't even exist in your original photo.
This gives you an incredible amount of creative freedom, whether you want subtle, gentle motion or a big, dramatic cinematic shot. And this tech is catching on fast. The global market for AI video is expected to jump from USD 7.6 billion in 2024 to an incredible USD 156.57 billion by 2034. If you're curious about the numbers, you can dig into the full market research report for the details.
This shot from OpenAI’s Sora is a perfect example of what's possible. The AI generated a hyper-realistic video of a woman walking through a neon-drenched Tokyo street, all from a text description.
Look at the lighting, the reflections in the puddles, and the natural human movement—it’s a stunning demonstration of the quality these generators can produce.
Key Takeaway: Image-to-video AI doesn't just "animate" a picture. It interprets, expands, and builds a believable story with motion from a single frame. This completely unlocks new possibilities for how we tell stories visually.
Key AI Generator Motion Capabilities
To get the most out of these tools, you need to know what they're capable of. Think of these as your director's toolkit for bringing a still image to life. Here’s a quick breakdown of the primary motion types you can control.
| Motion Type | Description | Best Use Case |
|---|---|---|
| Camera Motion | Simulates camera movements like pan, tilt, zoom, and rotate. | Creating a sense of scale, revealing a landscape, or adding a dramatic cinematic feel to a static scene. |
| Object Motion | Animates a specific subject or element within the image. | Making a product "float," showing a car driving, or having a person walk across the frame. |
| Ambient Motion | Adds subtle, natural movement to the background or environment. | Creating realistic scenes with wind in trees, steam from a coffee cup, or gentle ripples on water. |
| Masked Motion | Allows you to select a specific area of the image to animate while keeping the rest static. | Isolating movement to a single object, like a flickering candle flame, without affecting the entire image. |
Understanding these different controls is the first step toward crafting truly compelling videos. Once you get the hang of combining them, you can start creating some seriously impressive content.
Preparing Your Images and Storyboard
You can't get a great video out of an AI generator without first giving it great ingredients. It's a classic "garbage in, garbage out" situation. Before you get lost in crafting the perfect prompt, the real work begins with selecting your images and mapping out your story. This prep work is what separates a decent clip from a truly stunning one.
Think of it this way: the AI needs clean, clear information to build a believable scene. High-resolution images with a well-defined subject are non-negotiable. If you feed it a blurry, poorly lit, or cluttered photo, you’re just setting it up to fail. A crisp product shot will always animate better than a fuzzy image you grabbed from social media because the AI has more pixel data to interpret and build from.
Selecting the Right Images for Animation
Choosing the right image is half the battle. You have to think like a director and consider what kind of motion will actually serve the story you're trying to tell.
Here’s what I look for:
- Images with Depth: Pictures that have a clear foreground, middle ground, and background are gold. This natural separation gives the AI so much more to play with, allowing for those slick parallax effects and cinematic camera movements. Think landscape photos or street scenes.
- A Clear Subject: The AI is much better at animating something it can easily identify. A person, a car, a piece of furniture—these give the model a focal point to anchor the motion. Vague, abstract images are much harder to animate convincingly.
- Relatively Static Backgrounds: Let’s say you want to make a person walk. An image where they stand out against a simple background is ideal. This helps the AI isolate the subject and apply motion without getting confused by a chaotic environment.
The entire process is really a partnership between your image and your prompt.
The prompt is the bridge—it's your instruction manual telling the AI how to bring that static image to life.
Building Your Narrative Scene by Scene
Once your images are sorted, you need a plan. A storyboard is your video's blueprint. It doesn't have to be some fancy, professionally drawn affair; even just a few bullet points in a notepad can save you hours of trial and error. It’s all about mapping out your video’s beginning, middle, and end before you generate a single frame.
If you're creating anything more complex than a single clip, this step is essential. For a deeper dive into planning more intricate videos, you can learn how to create a Sora 2 storyboard.
Let’s walk through a real-world example. Imagine you're making a 15-second TikTok ad for a new hydrating skincare serum. Your storyboard could be as simple as this:
Example: Skincare Ad Storyboard
- Scene 1 (0-3 seconds): The Hook. Start with a striking image of a dry, wilting plant.
- Prompt: Camera slowly zooms in on the dry, cracked leaves, subtle dust particles floating in the air. This instantly creates a visual metaphor for dry skin that viewers will get.
- Scene 2 (4-9 seconds): The Solution. Switch to a clean, high-quality shot of the serum bottle.
- Prompt: Gentle water ripples emanate from the base of the bottle, product glows softly, camera pans up slowly. This positions the product as the hero that solves the problem.
- Scene 3 (10-15 seconds): The Result & CTA. End with a shot of a person with radiant, dewy skin.
- Prompt: Subtle sparkle effect on the skin, person smiles warmly, text 'Get Your Glow' animates on screen. This connects the product to the amazing result and gives a clear call-to-action.
This simple three-act structure tells a complete story in just a few seconds. By planning it out, you ensure every single clip has a purpose, which leads to a far more polished and effective ad.
Crafting the Perfect AI Video Prompt

When you're using an image-to-video AI generator, your prompt is everything. Think of it as your script, your director's notes, and your cinematographer's shot list all rolled into one. A vague prompt will get you a bland, generic video. But a sharp, descriptive one? That's how you guide the AI to create something that actually matches the vision in your head.
The real trick is learning to "speak AI." It's not just about listing what you want to see. You're building a detailed set of instructions, translating a creative idea into a technical command the machine can execute flawlessly. Every single word counts.
The Anatomy of a Powerful Prompt
The best prompts are layered. They aren't one long, rambling sentence but a collection of specific details that build a complete scene. A solid prompt almost always covers the subject, their action, the camera movement, and the overall atmosphere. If you leave one of these out, the AI is left to guess, and that rarely ends well.
For instance, don't just say, "a happy person." That’s a recipe for a weird, uncanny valley smile.
Instead, try something like: "A woman with brown hair, smiling warmly as she looks toward the camera, cinematic slow zoom in, soft golden hour lighting." This gives the AI a clear subject, a specific action, a camera directive, and the mood. It has everything it needs to get it right.
My Two Cents: I always think of prompts like a recipe. The subject is your main ingredient. The action is how you cook it. The camera move is the plating, and the atmospheric details are the final seasoning. You need all of them to make the dish work.
Controlling the Camera with Words
This is where the magic really happens. The ability to direct camera work is what turns a simple animation into something that looks and feels cinematic. Getting these terms down will completely change the quality of your video clips.
Here are a few of the camera commands I use all the time:
- Pan Left/Right Slowly: Gives you that smooth, sweeping shot. It's perfect for revealing a landscape or following someone as they walk.
- Tilt Up/Down: This is your vertical camera move. Great for showing off the height of a skyscraper or revealing something on the ground.
- Subtle Zoom In/Out: A slow, creeping zoom is a classic way to build tension or draw the viewer's eye to an important detail.
- Dolly Forward/Backward: This isn't just a zoom; it feels like the camera is physically moving through the scene. It's far more immersive and dynamic.
- Cinematic Drone Shot Ascending: Need an epic establishing shot? This is it. The camera flies up and away, giving you that grand, sweeping sense of scale.
You can even start combining these to get really precise. For a product ad, you might write: "Dolly forward slowly towards the product on the table, with a subtle pan right to reveal the logo." Now you're directing like a pro.
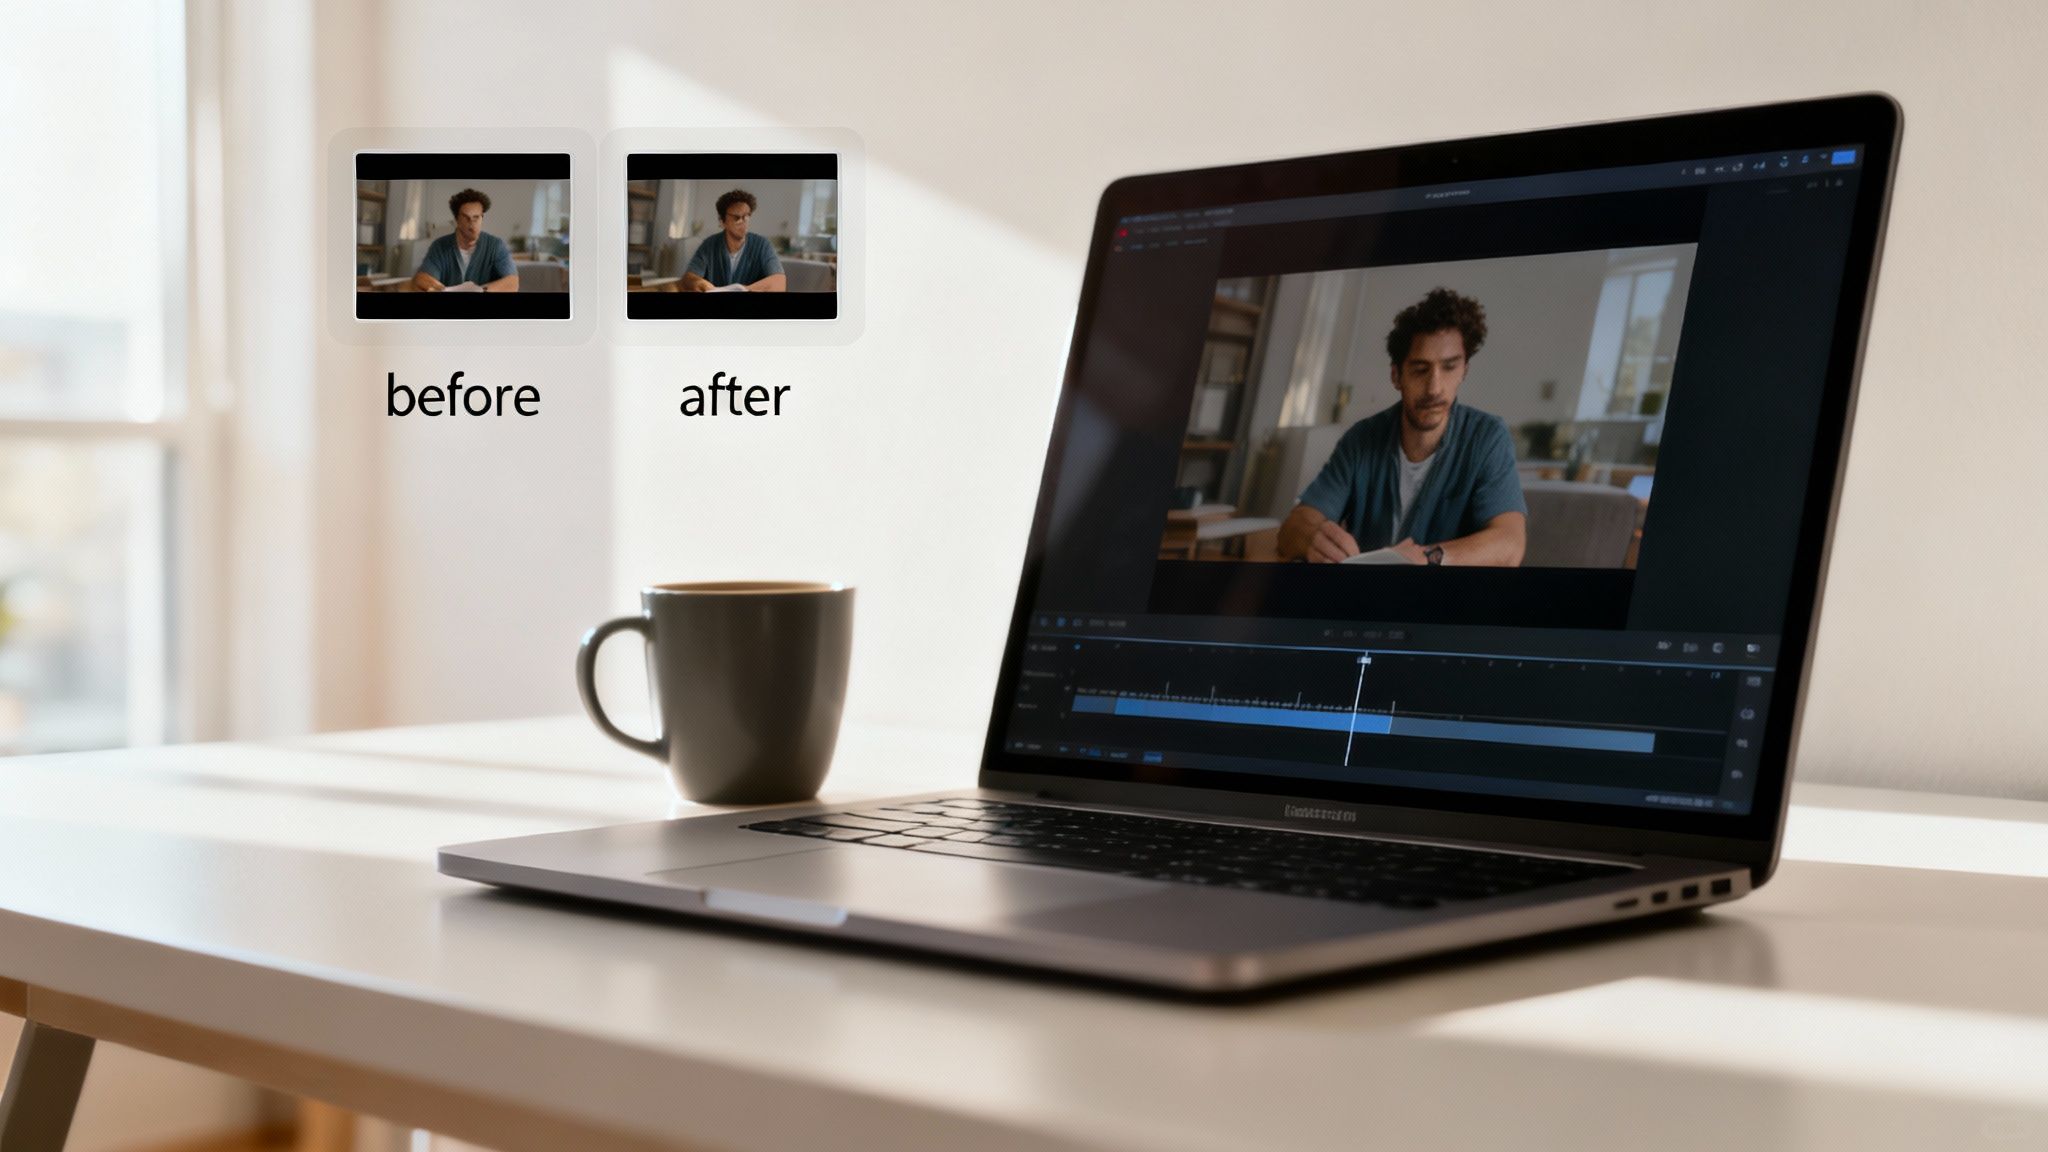
Before and After: The Power of a Detailed Prompt
The difference between a lazy prompt and a well-crafted one is night and day. Let's take a simple image of a coffee cup on a rainy day to see this in action.
Before (The Lazy Prompt):
"Animate the coffee cup."
What do you get? Maybe a weird shimmer or a slight wobble. It's boring because the instruction gave the AI nothing to work with. There’s no mood, no story, no direction.
After (The Detailed Prompt):
"Steam rising gently from the black coffee cup. Raindrops slide down the window pane in the background. Camera slowly pushes in on the cup, focus pulls from the window to the cup. Cozy, warm lighting."
See the difference? This prompt creates a whole vibe. It tells the AI exactly what to animate (the steam and rain), what the camera should do, and what the mood feels like. The result is a professional clip that tells a micro-story, which is what you need to grab someone's attention.
Of course, this is all about starting with an image. If you want to dive into creating from scratch, check out our complete guide on mastering the text-to-video process.
Prompt Modifiers for Precise Control
To really dial in your results, you need to get comfortable with modifiers. These are the little descriptive words that add style, nuance, and flavor to your prompts. I've put together a quick table of the ones I find most useful.
Prompt Modifiers for AI Video Generation
| Modifier Category | Example Prompts | Effect on Video |
|---|---|---|
| Pacing and Speed | "slowly," "gently," "rapidly," "fast-paced" | Controls the speed of animations and camera movements, setting the video's energy. |
| Lighting and Mood | "golden hour," "dramatic shadows," "soft ambient light" | Defines the emotional tone and visual aesthetic, from warm and inviting to tense and mysterious. |
| Style and Aesthetic | "hyperrealistic," "cinematic," "vintage film look" | Instructs the AI on the overall visual style, mimicking different film stocks or artistic looks. |
| Intensity | "subtle," "slight," "dramatic," "intense" | Modifies the strength of an effect, like a "subtle zoom" versus a "dramatic zoom." |
Getting a feel for these modifiers is what takes you from just using the tool to actually creating with it. It lets you fine-tune every little detail so the final video is a perfect match for your brand or story. The best way to learn is to play around—generate the same clip but swap out one modifier. You'll be amazed at how a single word can change everything.
Assembling Your AI-Generated Video Clips
https://www.youtube.com/embed/eC8wfWc3dVU
So, you’ve used an image to video ai generator to create a batch of awesome clips. That’s a huge step, but it’s really just gathering your raw ingredients. The real magic happens in the kitchen—the editing timeline—where you turn those individual shots into a story that flows. This is where you shift gears from prompt writer to video editor.
The great news is you don't need a high-end, expensive editing rig for this. Fantastic free tools like CapCut and DaVinci Resolve are more than powerful enough to get the job done. Our goal here is simple: take our AI clips, assemble them into a compelling narrative, and make sure it’s perfectly formatted for whatever platform we're aiming for.
From Raw Clips to a Cohesive Story
First things first, get all of your generated clips into your editor's timeline. Think of it like dumping all your Lego bricks on the floor before you start building. This is your first chance to see how the storyboard you planned translates into a rough video sequence.
From here on out, it’s all about timing. A single clip that overstays its welcome can throw off the entire rhythm of your video. Your most important tool is the trim function.
- Trimming the Fat: Go through each clip, one by one, and be ruthless. Is there a slow start before the action kicks in? Cut it. Does the shot linger a bit too long after the main movement ends? Get rid of it. Every frame should earn its place, especially when you're fighting for attention on social media.
- Perfecting the Pace: Now, arrange your trimmed clips in the order you originally storyboarded. Hit play and watch it through. Does the jump from one scene to the next feel smooth or abrupt? Sometimes you’ll find that swapping just two clips can make the entire story feel much more intuitive.
The secret to great editing is knowing what to leave out. Your audience has a limited attention span, and your job is to make every frame justify its existence. Short, punchy clips often have a much bigger impact than longer, meandering ones.
Adding Polish with Transitions and Sound
With your clips sequenced and timed, it’s time to add the finishing touches that separate a simple slideshow from a professional video. This means smoothing out the cuts between scenes and building a soundscape.
Transitions are the glue holding your scenes together. It’s easy to get carried away with flashy spins and wipes, but more often than not, simple is better. A quick cross-dissolve or a fade to black feels much more cinematic and keeps the focus on your story.
Next up is audio, which is easily 50% of the video experience.
- Background Music: Find a track that fits the vibe. If you’re making a high-energy ad, you need an upbeat track. For a calm product showcase, something mellow and ambient is the way to go. Most editors offer a library of royalty-free options.
- Voiceover: If your story needs narration, now’s the time to record it. A clear voiceover can add a ton of context, explain key benefits, or just guide the viewer through the narrative.
- Sound Effects (SFX): Never underestimate the power of good SFX. A little "whoosh" sound to accompany a fast camera movement or a subtle "click" when a logo appears can make the whole video feel more alive and engaging.
If you want to get a head start, professionally designed templates can be a huge time-saver. For instance, using pre-made Sora2 video templates gives you a solid framework to build on, often with placeholders and audio cues already in place.
Exporting for Maximum Impact
You're almost there. The final, critical step is exporting your video with the right settings for its destination. This is where a lot of great work gets ruined. The wrong format can result in a blurry mess, weird cropping, or even an upload failure.
Every platform has its own "sweet spot" for video specs. Nailing these settings ensures your video looks sharp and plays nicely with the platform's algorithm.
Platform-Specific Export Settings
| Platform | Aspect Ratio | Resolution (Recommended) | Format |
|---|---|---|---|
| TikTok & Instagram Reels | 9:16 (Vertical) | 1080x1920 pixels | MP4 |
| Shopify Product Video | 16:9 (Horizontal) or 1:1 (Square) | 1920x1080 or 1080x1080 | MP4 |
| YouTube Shorts | 9:16 (Vertical) | 1080x1920 pixels | MP4 |
| Standard YouTube Video | 16:9 (Horizontal) | 1920x1080 (or higher) | MP4 |
Before you hit that final render button, always double-check these settings in your export menu. A moment of care here makes sure all your hard work pays off with a video that looks fantastic and is ready to grab attention.
Getting It Right: Advanced Tips and Troubleshooting
Sooner or later, every creator using an image to video ai generator runs into the same quirks. The "perfect" prompt doesn't always deliver a perfect result, and you'll inevitably face weird motion, strange flickering, or details that just feel off.
Don't get discouraged. This is where the real craft comes in. Learning to diagnose and fix these common problems is what separates a decent AI video from a truly stunning one. With a few pro techniques, you can start guiding the AI with more precision and iron out those frustrating imperfections.
Fixing Unnatural Motion and Flickering
One of the most common issues I see is that dreaded "AI jiggle," where an object moves in a strange, almost rubbery way. Another is a subtle flicker that often appears in detailed textures or backgrounds. These artifacts usually pop up when the AI gets confused by a complex scene or has to work with a lower-quality image.
Your first line of defense is always the prompt. Try adding a few modifiers to stabilize the scene:
- Be a director: Use phrases like "still background," "fixed camera," or "minimal ambient motion" to tell the AI what not to animate.
- Dictate the pace: Instead of just "pan left," get specific with "very slow pan left." Controlling the speed can smooth out a lot of jerky movements.
- Dial back the intensity: Most generators have a motion strength setting. Lowering this value can be a quick fix for unwanted jitter and strange artifacts.
Sometimes, the problem isn't the prompt but the source image. A blurry or low-contrast image forces the AI to guess, and that guesswork often leads to flickering. Just sharpening your image or boosting the contrast before you upload can make a world of difference.
The Power of Negative Prompts
Telling the AI what you want is only half the battle. The real magic often happens when you tell it what you don't want. This is exactly what negative prompts are for—they act as guardrails to keep the AI from making common mistakes.
Think of it as a bouncer for your video. If you're animating a peaceful forest scene but the AI keeps adding weird, blurry animals in the background, a negative prompt is how you kick them out.
My Pro Tip: Keep a running text file of your go-to negative prompts. It's a lifesaver. Mine usually includes terms like: "blurry, distorted, flickering, unnatural motion, extra limbs, watermark, text." It's amazing how many generations this simple list cleans up right away.
By explicitly forbidding these unwanted elements, you give the AI clearer boundaries. The result is a much cleaner clip that's actually in line with your creative vision.
Keeping Your Style Consistent
When you're stitching multiple scenes together, consistency is everything. How do you make sure your character looks the same from one clip to the next? Or that the lighting doesn't suddenly change? It all comes down to strategic prompting and a bit of planning.
- Anchor your style: Use a consistent stylistic phrase in every single prompt. If your first scene is "cinematic, golden hour lighting," then every other prompt for that video needs it, too.
- Describe your subject religiously: Don't just say "a man." Be hyper-specific: "a man with short brown hair, a blue jacket, and glasses." You have to repeat these core details in each prompt to keep the AI on track.
The demand for these tools is exploding. The AI video generator market was valued at a staggering USD 554.9 million in 2023 and is projected to hit USD 1.96 billion by 2030. This intense growth is forcing developers to get much better at solving these exact consistency issues. If you want to dig into the numbers, you can read the full market report on AI video generators. For us creators, this competition is great news—it means the tools are only going to get smarter and more reliable.
Got Questions About AI Video Generation? You're Not Alone.
As you dive into the world of image-to-video AI, you’re bound to hit a few head-scratchers. This tech is moving at a breakneck pace, so it’s totally normal to have questions about what it can do, what it costs, and where the lines are drawn. Let's tackle some of the most common ones I hear from other creators.
So, What's This Going to Cost Me?
The price tag for an AI video generator is all over the map, which is actually a good thing. There's an option for pretty much everyone, from curious beginners to full-scale agencies.
Most tools I've seen use a freemium model to let you test the waters. You'll usually get a handful of free credits to generate a few short clips, but they'll likely come with a watermark. It’s a great way to kick the tires.
Once you’re ready to commit, paid plans for solo creators and small businesses typically land in the $20 to $50 per month range. This usually gets you more credits, ditches the watermark, and unlocks higher-quality exports like 1080p or 4K. For the big guns needing massive volume or API access, enterprise plans can scale up into the hundreds or thousands.
Here's my two cents: Don't just jump on the first tool you see. Sign up for the free trials on a few different platforms. Get a feel for their workflow and see if the style of video they produce matches your vision. You'll quickly find one that just clicks, and that's the one worth paying for.
What Are the Biggest Headaches and Limitations Right Now?
Look, this technology is mind-blowing, but it's not magic. It has its quirks. One of the biggest hurdles right now is long-term consistency. You can generate a perfect clip of a character, but ask the AI to create a second clip, and suddenly their shirt has changed color or their hairstyle is slightly different. Developers are working on this, but it’s a real challenge.
Physics is another tricky area. The AI can make a car drive down a road beautifully, but it might struggle with the nuances of how a silk scarf flutters in the wind or how water realistically splashes against a rock. Fine details, especially things like hands and complex facial expressions, can also sometimes dip into the "uncanny valley," looking almost real but not quite right.
And don't forget clip length. Most generators are built to create short bursts of video, usually just a few seconds long. This means you'll need to get comfortable with a video editor to stitch these short scenes together into a complete story.
Can I Just Grab an Image Off Google to Make a Video?
This is a big one, and the answer is a hard no. Using copyrighted images you don't have the rights to is a surefire way to get into legal trouble. A video you create from someone else's photo is considered a "derivative work," and without their permission, you’re infringing on their copyright.
To keep yourself safe and your projects legitimate, stick to these sources:
- Your own photos and original artwork.
- Royalty-free stock images from sites like Unsplash or Pexels.
- Images that are clearly in the public domain.
This is non-negotiable, especially if you plan to use your videos for anything commercial, like ads or on your website.
Just How Fast Is This AI Video Stuff Growing?
To put it mildly, the growth is explosive. The engine behind these video tools—generative AI—is one of the fastest-growing tech sectors we've ever seen. The global AI image and video generator market was valued at USD 8.7 billion in 2024 and is on a trajectory to hit an incredible USD 60.8 billion by 2030.
That’s a compound annual growth rate of 38.2%. You can dig deeper into the market expansion trends driving this growth if you're curious.
What does that mean for you? All that money and competition means the tools are improving at a dizzying speed. The limitations we’re talking about today could very well be solved by next year, or even next month.
Ready to stop reading and start creating? saro2 lets you craft stunning, Sora-style cinematic videos directly from your images—no waitlist, no watermarks. Bring your ideas to life today at https://saro2.ai.