How to Make Cinematic Videos Like a Pro
Learn how to make cinematic videos with our complete guide. Master camera settings, lighting, color grading, and sound for truly stunning results.
Making a cinematic video isn't just about pointing and shooting; it's about deliberately weaving together storytelling, lighting, and sound to make your audience feel something. It’s the art of turning ordinary footage into a piece that feels like it belongs on a big screen. We'll be focusing on intentional camera movements, sophisticated color grading, and immersive audio design to get there.
The Blueprint for a Cinematic Look
Here’s a secret that experienced filmmakers know: creating cinematic videos has less to do with the price of your camera and more to do with the principles you follow. It’s a shift in mindset—from simply recording an event to actually crafting an experience for the viewer.
The "cinematic look" is really just an intentional aesthetic, built on a foundation of classic filmmaking techniques. Thankfully, these techniques are more accessible today than ever before, especially with new tools that merge old-school methods with powerful technology.
At its core, the goal is to guide your audience's emotions. Every single choice, from the camera angle to the color of the light, adds to the story's tone. Think about it: a warm, golden-hour glow can make a scene feel nostalgic, while cool, blue-tinted shadows can instantly build suspense. This emotional direction is what separates a standard video from a truly cinematic one.
This guide will break down the essential components you need to master. We'll explore:
- Compelling Storytelling: How to build a narrative, even in a very short clip, that hooks viewers from the first second.
- Intentional Visuals: The art of composition, lighting, and camera movement to create depth and guide the viewer's eye.
- Immersive Post-Production: Using color and sound to sharpen the mood and give your final product a professional polish.
The Core Principles of Cinematic Video
When you boil it all down, the process really rests on three key pillars working together. You start with a solid narrative, bring it to life with purposeful lighting, and then deepen the atmosphere with thoughtful sound design.
This chart shows how these foundational elements—storytelling, lighting, and sound—are the building blocks of any great film.
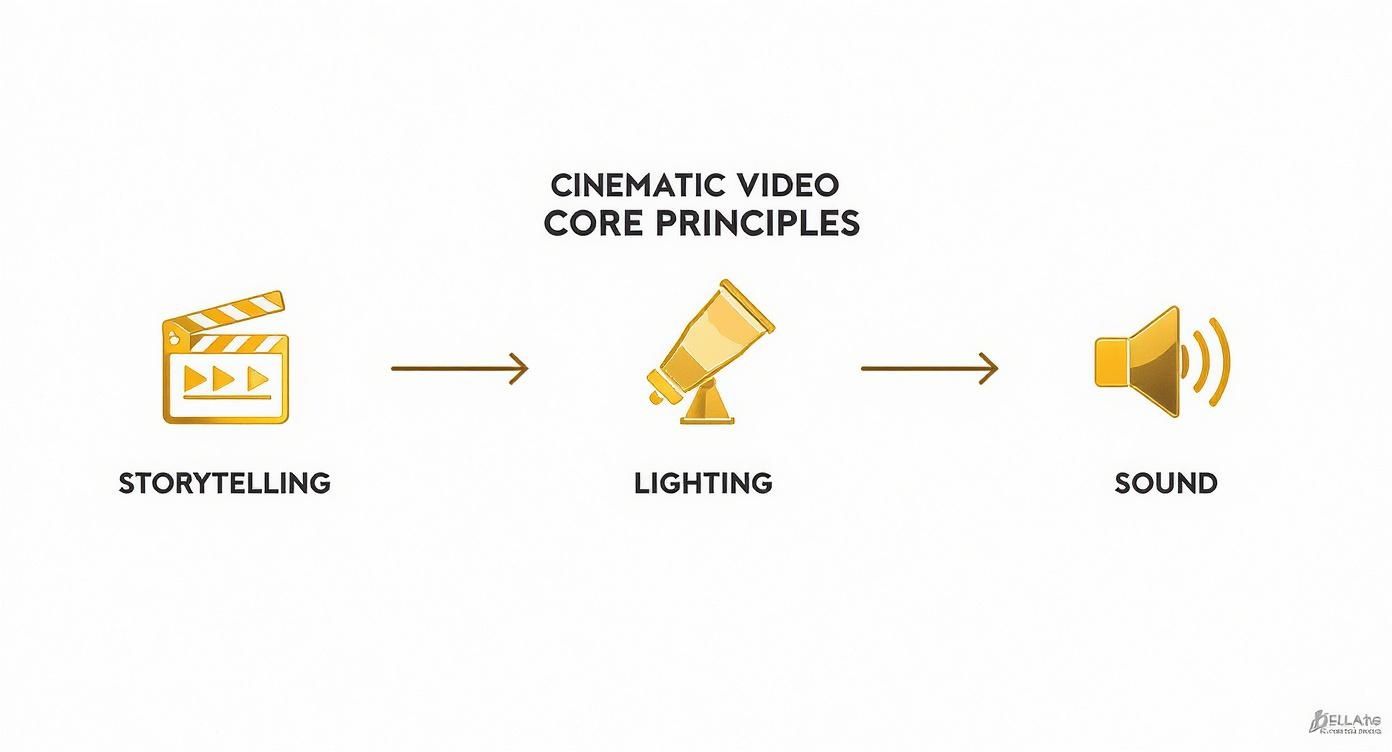
The takeaway here is simple: a strong story is always the starting point. Lighting and sound are the powerful tools you use to bring that narrative to life, both visually and audibly.
Blending Classic Techniques with Modern Tools
In the past, getting that cinematic look required a truckload of expensive equipment and years of technical training. Not anymore. Technology has completely changed the game, putting that power into everyone's hands. You can apply these timeless principles using anything from a smartphone to advanced AI video generators like Sora 2.
For example, instead of waiting for perfect natural light, you can now write a prompt that specifies "dramatic Rembrandt lighting" and generate the exact mood you’re after.
The Big Idea: Cinematic video isn't a filter or a setting you turn on; it's a visual language you learn. The fundamentals of storytelling, light, and sound are the same whether you're holding a camera or writing a text prompt.
Once you understand these fundamentals, you gain incredible control over your final video. You're no longer just capturing footage; you’re becoming a visual storyteller, ready to create content that sticks with people.
Laying the Groundwork: Your Vision Before You Shoot
The best cinematic videos—the ones that really stick with you—are built on a solid foundation long before a camera is ever picked up. This pre-production phase is where the magic really begins. It’s where you map out your story, making sure every single shot, every angle, and every cut has a purpose. This is what separates a random collection of pretty clips from a story that genuinely pulls people in.
Trust me, jumping straight into filming without a plan is a classic mistake. You might get lucky with a few cool-looking shots, but the final video will feel disconnected and amateurish. A little planning up front forces you to think like a director, not just someone holding a camera.
Nailing Down Your Core Concept
Every great video starts with a single, powerful idea. What story are you telling? What feeling are you trying to leave with your audience? It doesn't matter if it's a quick 30-second ad for your Shopify store or a sweeping travel film for TikTok; the concept is your North Star.
To get there, start by asking yourself a few simple questions:
- Who am I talking to? A high-energy, quick-cut video for Gen Z will feel totally different from a slow, moody piece for a luxury brand.
- What's the one thing they must remember? If they walk away with only a single thought, what is it?
- How should they feel? Are you going for excitement? Nostalgia? Inspiration? Curiosity?
Let’s say you sell handmade candles. A great concept could be "finding a quiet moment in a chaotic world." That simple phrase instantly gives you a creative direction. You’re already thinking about soft lighting, gentle camera movements, and cozy, peaceful locations.
Building Your Visual Blueprint with a Mood Board
Once you’ve got the concept, it’s time to give it a look. A mood board is essentially a collage—a collection of images, colors, and textures that defines the entire aesthetic of your video. It's your visual anchor, the thing you can always refer back to to make sure everything stays consistent.
Think of it like gathering ingredients before you start cooking. You might pull screenshots from films you love, find photos that have the exact lighting you're picturing, or grab color palettes that evoke the right feeling. Pinterest is a fantastic tool for this. For our candle business, the mood board would probably be filled with images of warm, inviting interiors, earthy color tones like burnt orange and deep brown, and textures like wood grain and soft linen.
A great mood board isn't just for inspiration. It sets the visual rules for your project. It’s the guide that ensures every choice—from wardrobe to location to the final color grade—serves the main idea.
This is what makes a video feel intentional and professional. It’s a signature of high-quality cinematic work.
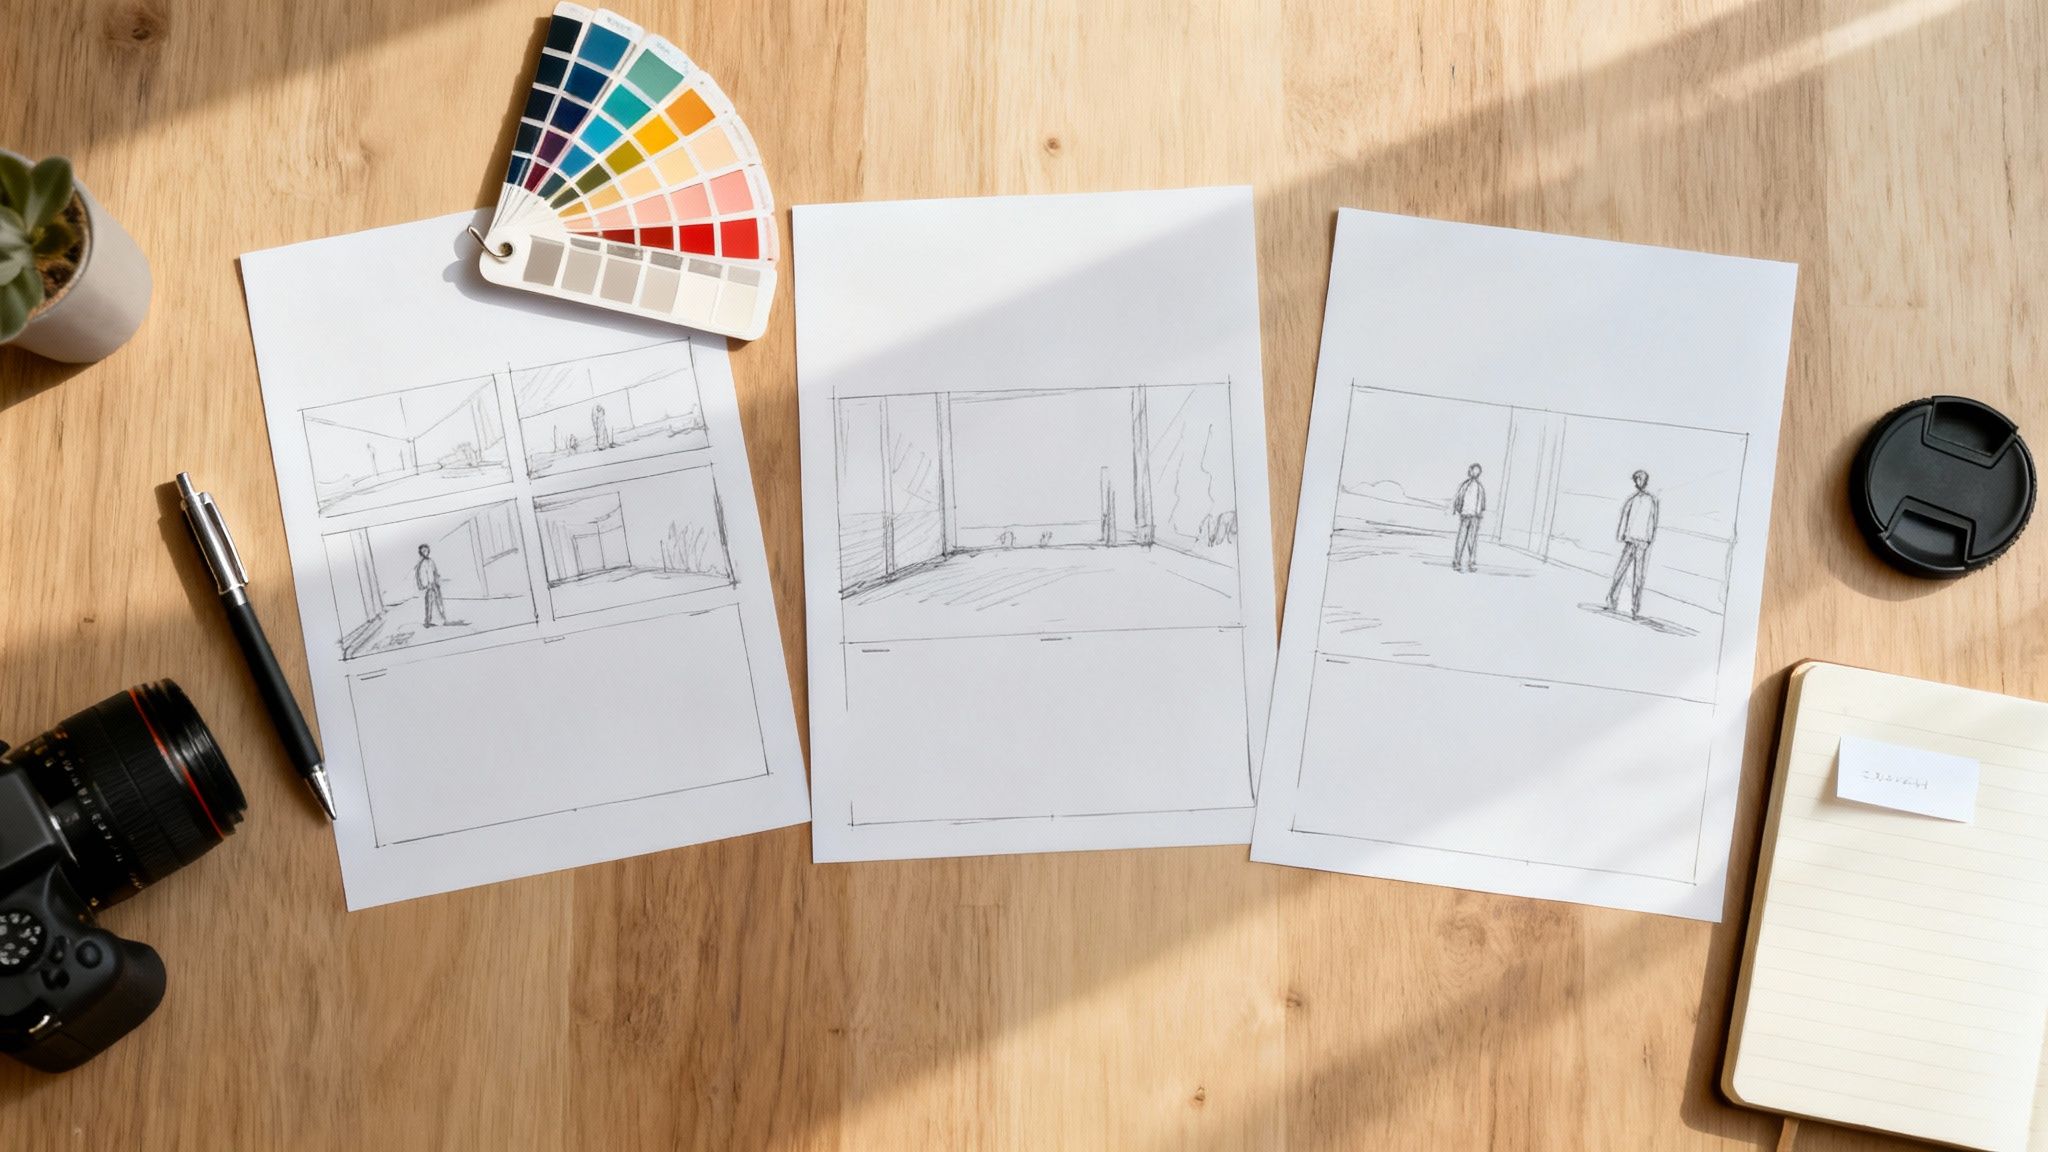
Why Storyboarding Is Your Secret Weapon
A storyboard is just a sequence of sketches or images that lays out your video shot by shot. It’s the roadmap. While it might feel like an extra, skippable step, storyboarding is the single best thing you can do to bring your vision to life accurately.
It forces you to think through the story's flow before the pressure is on. You can spot problems, refine your ideas, and plan your shots with total clarity. When filming day arrives, you won't be guessing; you'll know exactly what you need to capture, saving you a ton of time and stress.
A simple storyboard for a product ad might break down like this:
- Wide Shot: Show a person looking stressed out at a cluttered desk.
- Close-Up: Their hand moves into the frame to light a candle.
- Medium Shot: A look of calm and relaxation washes over their face.
- Extreme Close-Up: The gentle flicker of the candle flame.
- Final Shot: The product is beautifully displayed next to the company logo.
See? Simple, clear, and totally effective.
Taking Your Storyboard to the Next Level with AI
This is where things get really interesting. Modern tools can completely change how you approach this. For example, Sora-style AI platforms like saro2 have a multi-scene storyboard feature that lets you build out an entire narrative using text prompts. Instead of sketching by hand, you describe each scene and watch the AI generate a consistent visual sequence for you.
Imagine you're planning a short travel film. You could feed the AI prompts like this:
- Scene 1: "A lone hiker stands on a misty mountain peak at sunrise, dramatic cinematic lighting."
- Scene 2: "Drone shot, following the hiker from behind as they walk along a narrow, rocky ridge."
- Scene 3: "Close-up on the hiker's worn boots crunching on the trail, bathed in golden hour light."
The AI can then generate these clips for you, keeping the same character, style, and mood across all three scenes. What you get is a dynamic, living storyboard that acts as both a rock-solid plan and a source of incredible inspiration. It's the perfect bridge between your initial spark of an idea and the finished cinematic video.
Mastering Cinematic Composition and Light
With a solid story mapped out, it's time to get your hands dirty with the visual language of film. Composition and lighting are the true grammar of filmmaking. How you frame a shot and splash light across a scene tells your audience exactly where to look, what to feel, and what truly matters.
Great composition isn't about memorizing a rulebook. It's about making deliberate choices that serve the story. You're arranging every element in the frame to guide the viewer’s eye, build an emotional connection, and create a sense of balance. Nailing these fundamentals is what separates a simple recording from a professional, cinematic shot.
Framing Your World with Classic Composition
Some techniques are classics for a good reason—they just work. They tap into how we naturally see the world, making your shots instantly more compelling.
- The Rule of Thirds: Picture your screen divided by a 3x3 grid. Instead of sticking your subject smack in the middle, try placing them along one of the lines or where two lines intersect. This simple shift creates a more dynamic and visually pleasing image.
- Leading Lines: Look for natural lines in the environment—a road, a fence, a shadow—and use them to pull the viewer's gaze right to your subject. It's a fantastic trick for creating depth and forcing the audience's attention exactly where you want it.
- Depth of Field: This is all about what’s in focus. A shallow depth of field keeps your subject tack-sharp while beautifully blurring the background, isolating them for a focused, dreamy effect. On the other hand, a deep depth of field keeps everything sharp from front to back, perfect for those epic landscape shots where the environment is a character itself.
Playing with these ideas will immediately elevate your footage.
Pro Tip: Don't just plop your subject on a grid line and call it a day. Pay attention to the "negative space." If your subject is looking to the right, give them more room on that side of the frame. This "looking room" just feels more natural and less boxed-in.
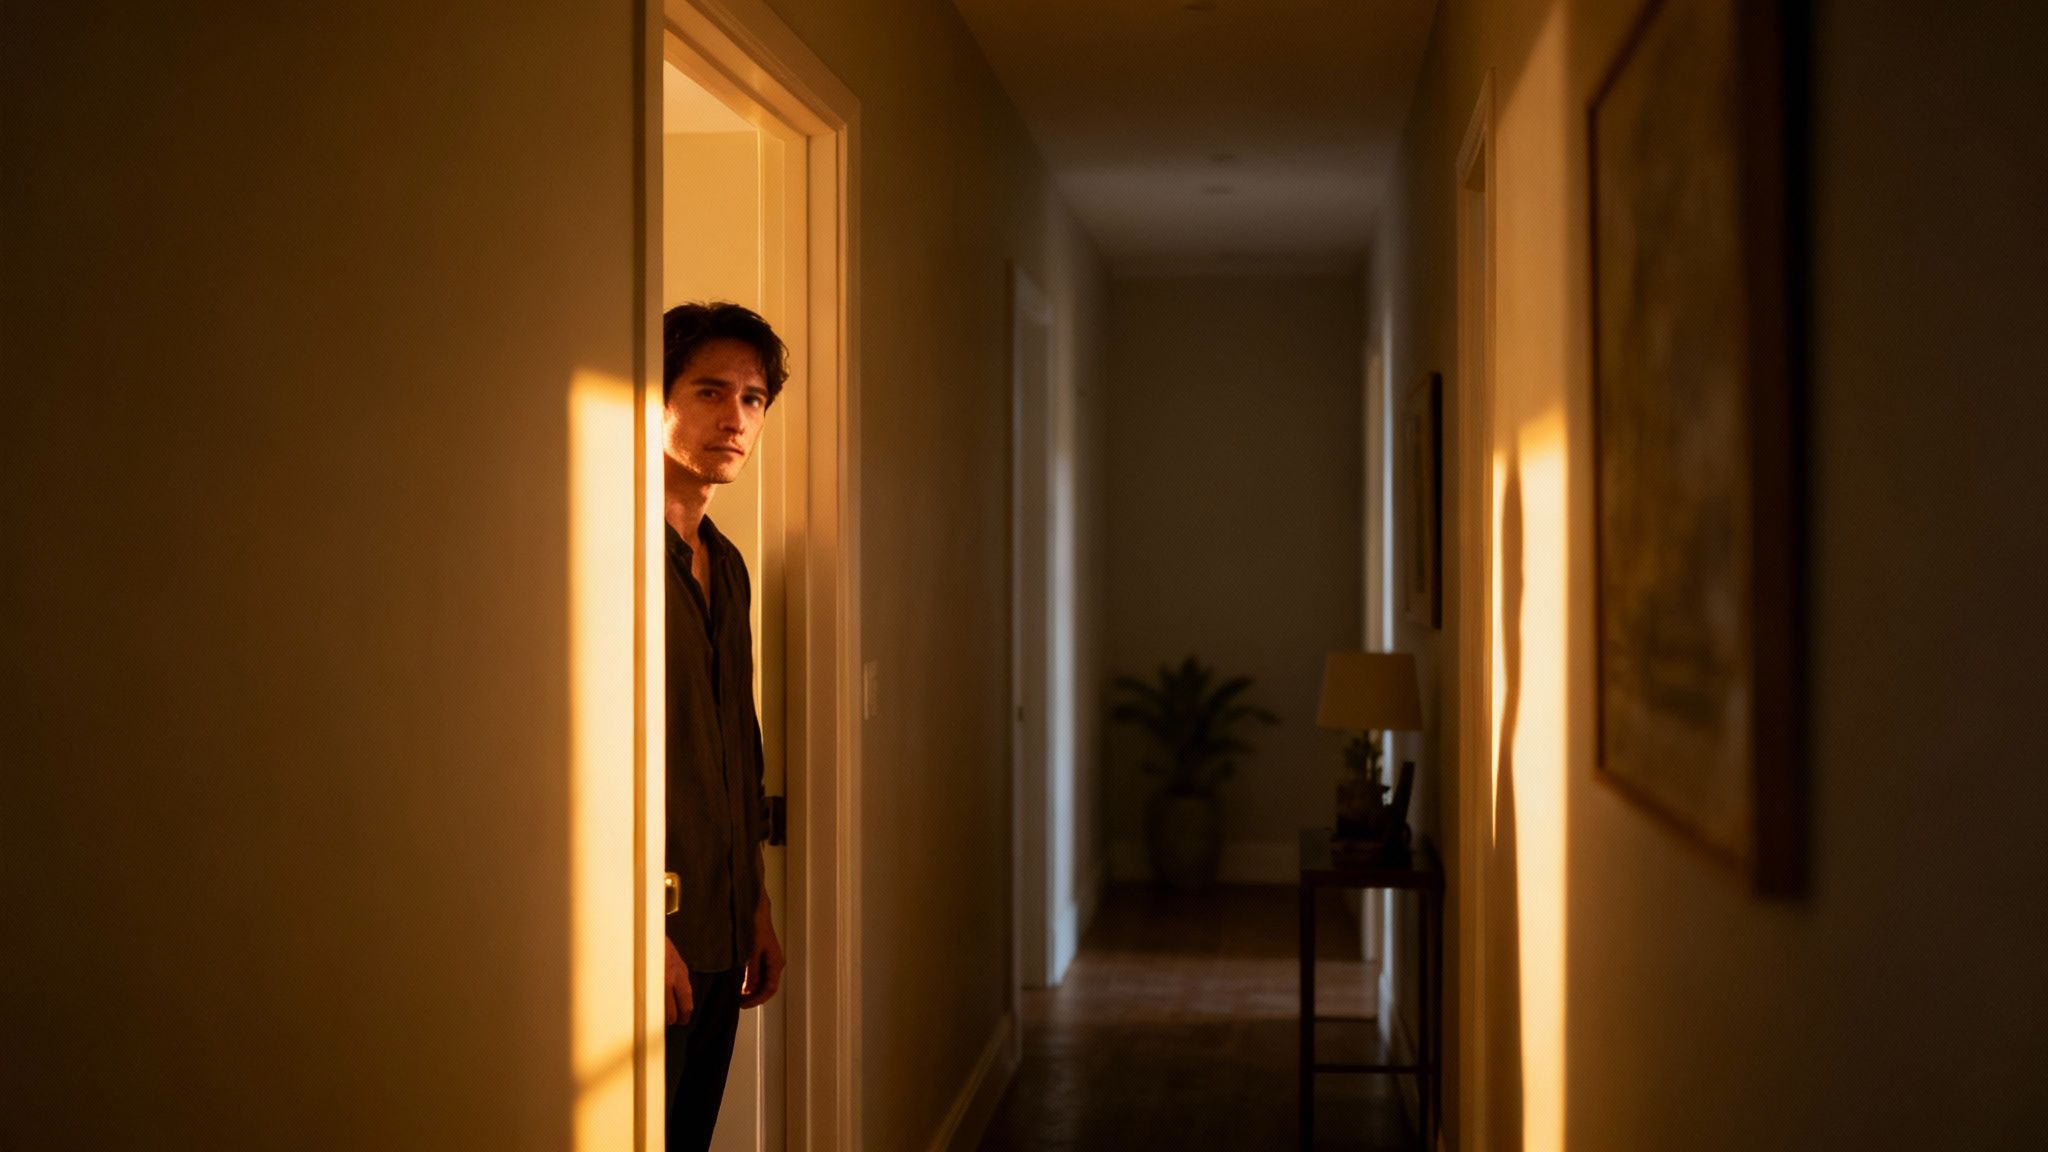
Lighting for Emotion and Mood
If there's one tool that can completely transform a scene, it's lighting. It does so much more than just make things visible; it sculpts the world. Lighting carves out mood, directs focus, and reveals texture and shape. A room can feel warm and inviting or cold and menacing based on nothing more than how you light it.
You don't need a Hollywood budget to get started. Understanding a few core ideas is enough. A single, harsh overhead light creates ugly shadows, while soft, diffused light from the side can wrap your subject in a gentle, cinematic glow.
A perfect starting point is the time-tested three-point lighting setup.
- Key Light: This is your primary, brightest light source. It's typically placed to one side of the camera to define the subject.
- Fill Light: Set on the opposite side, this is a softer light used to "fill in" the harsh shadows from the key light, softening the overall look.
- Backlight: This light comes from behind your subject, separating them from the background. It creates that subtle outline or "rim light" that adds a ton of depth.
And you can get creative here. A big window makes for a brilliant key light, and a cheap white poster board works wonders as a fill light to bounce some of that light back into the shadows.
Translating Lighting Concepts into AI Prompts
Here’s where old-school technique meets new-school tech. You can take all these classic lighting principles and bake them directly into your AI prompts. Instead of moving physical lights around, you're using descriptive language to tell the AI exactly what kind of mood you're chasing.
This is where your filmmaking knowledge gives you a massive advantage. You can direct an AI video generator like saro2 with the precision of a seasoned cinematographer.
| Desired Mood | Example AI Prompt Language |
|---|---|
| Warm & Nostalgic | "...shot during golden hour, with long, soft shadows and a warm, orange glow." |
| Suspenseful & Tense | "...lit with dramatic Rembrandt lighting, with one side of the face in deep shadow." |
| Futuristic & Clean | "...using cool, blue-toned neon lights, high contrast, clean, minimalist setting." |
| Soft & Dreamy | "...filmed with soft, diffused natural light pouring through a window, low contrast." |
By being this specific with your lighting direction, you’re no longer just a user—you’re a director. You’re ensuring the AI’s output perfectly matches the emotional tone you set out to achieve in your storyboard, creating a truly cinematic and cohesive final piece.
Using Camera Movement and Settings for a Film Look
Static shots have their place, but movement is what truly breathes life into your story. It’s the difference between showing your audience a picture and inviting them into a world. Getting that professional film look isn't just about what you shoot, but how you shoot it.
Intentional, controlled camera movement is one of the clearest signals of a high-quality production. Think about it—shaky, random footage just screams "amateur." By mastering a few key movements, you can add a layer of sophistication that elevates everything. Each type of movement carries its own emotional weight, acting as a subtle but powerful storytelling tool.
Mastering Intentional Camera Movements
Forget frantic, jerky motions. Cinematic movement is all about being smooth and deliberate. Every pan, tilt, or dolly needs a clear purpose, a defined beginning, middle, and end that serves the narrative.
Here are the foundational movements you should get comfortable with:
- Pan: This is a slow horizontal sweep, left or right. A pan is perfect for revealing a wide landscape, following a character as they walk across the screen, or connecting two subjects in a single, fluid shot.
- Tilt: A vertical movement, either up or down. Tilting up can make a subject feel powerful and imposing (think of looking up at a hero). Tilting down often creates a sense of vulnerability or discovery.
- Dolly/Slider: This is where you physically move the entire camera forward, backward, or sideways. A slow "dolly in" toward a character can build incredible tension or intimacy. A "dolly out" can reveal their isolation or the grand scale of their surroundings. Using a slider is the key to making this look impossibly smooth.
When you nail these movements, they feel almost invisible to the audience. They guide the eye naturally without drawing attention to the camera itself, which is essential for creating an immersive experience.
The best camera movement always feels motivated. It should feel like the camera is moving for a reason—to follow the action, reveal crucial information, or emphasize an emotion—not just for the sake of moving.
Choosing the Right Camera Movement for Emotional Impact
To truly learn how to make cinematic videos, you have to start thinking like a director. At any given moment, ask yourself: which movement will best serve the story right now? It's about connecting motion to emotion.
This table breaks down some of the most common camera movements and the specific emotional or narrative effects they help create.
| Movement Type | Description | Emotional/Narrative Effect | Common Use Case |
|---|---|---|---|
| Slow Pan | The camera swivels horizontally on a fixed point. | Expansive, revealing, observational | Showing off a vast desert landscape or establishing the layout of a room. |
| Slow Dolly In | The entire camera moves physically closer to the subject. | Intimacy, tension, focus, realization | Moving closer to a character's face as they process a shocking piece of news. |
| Dolly Out | The camera physically moves away from the subject. | Isolation, finality, revelation | Pulling back from a character to show they are utterly alone in a huge space. |
| Tilt Up | The camera pivots vertically upward. | Power, grandeur, awe, triumph | Revealing the full height of a skyscraper or a hero standing tall after a battle. |
| Tracking Shot | The camera moves alongside the subject, often on a dolly or gimbal. | Dynamic, immersive, journey, urgency | Following a character as they run through a crowded street or walk through a party. |
As you can see, the choice isn't random. A dolly-in creates a very different feeling from a dolly-out, even if the subject is the same. Matching the movement to the moment is what separates good footage from great filmmaking.
The Technical Settings for That Classic Film Look
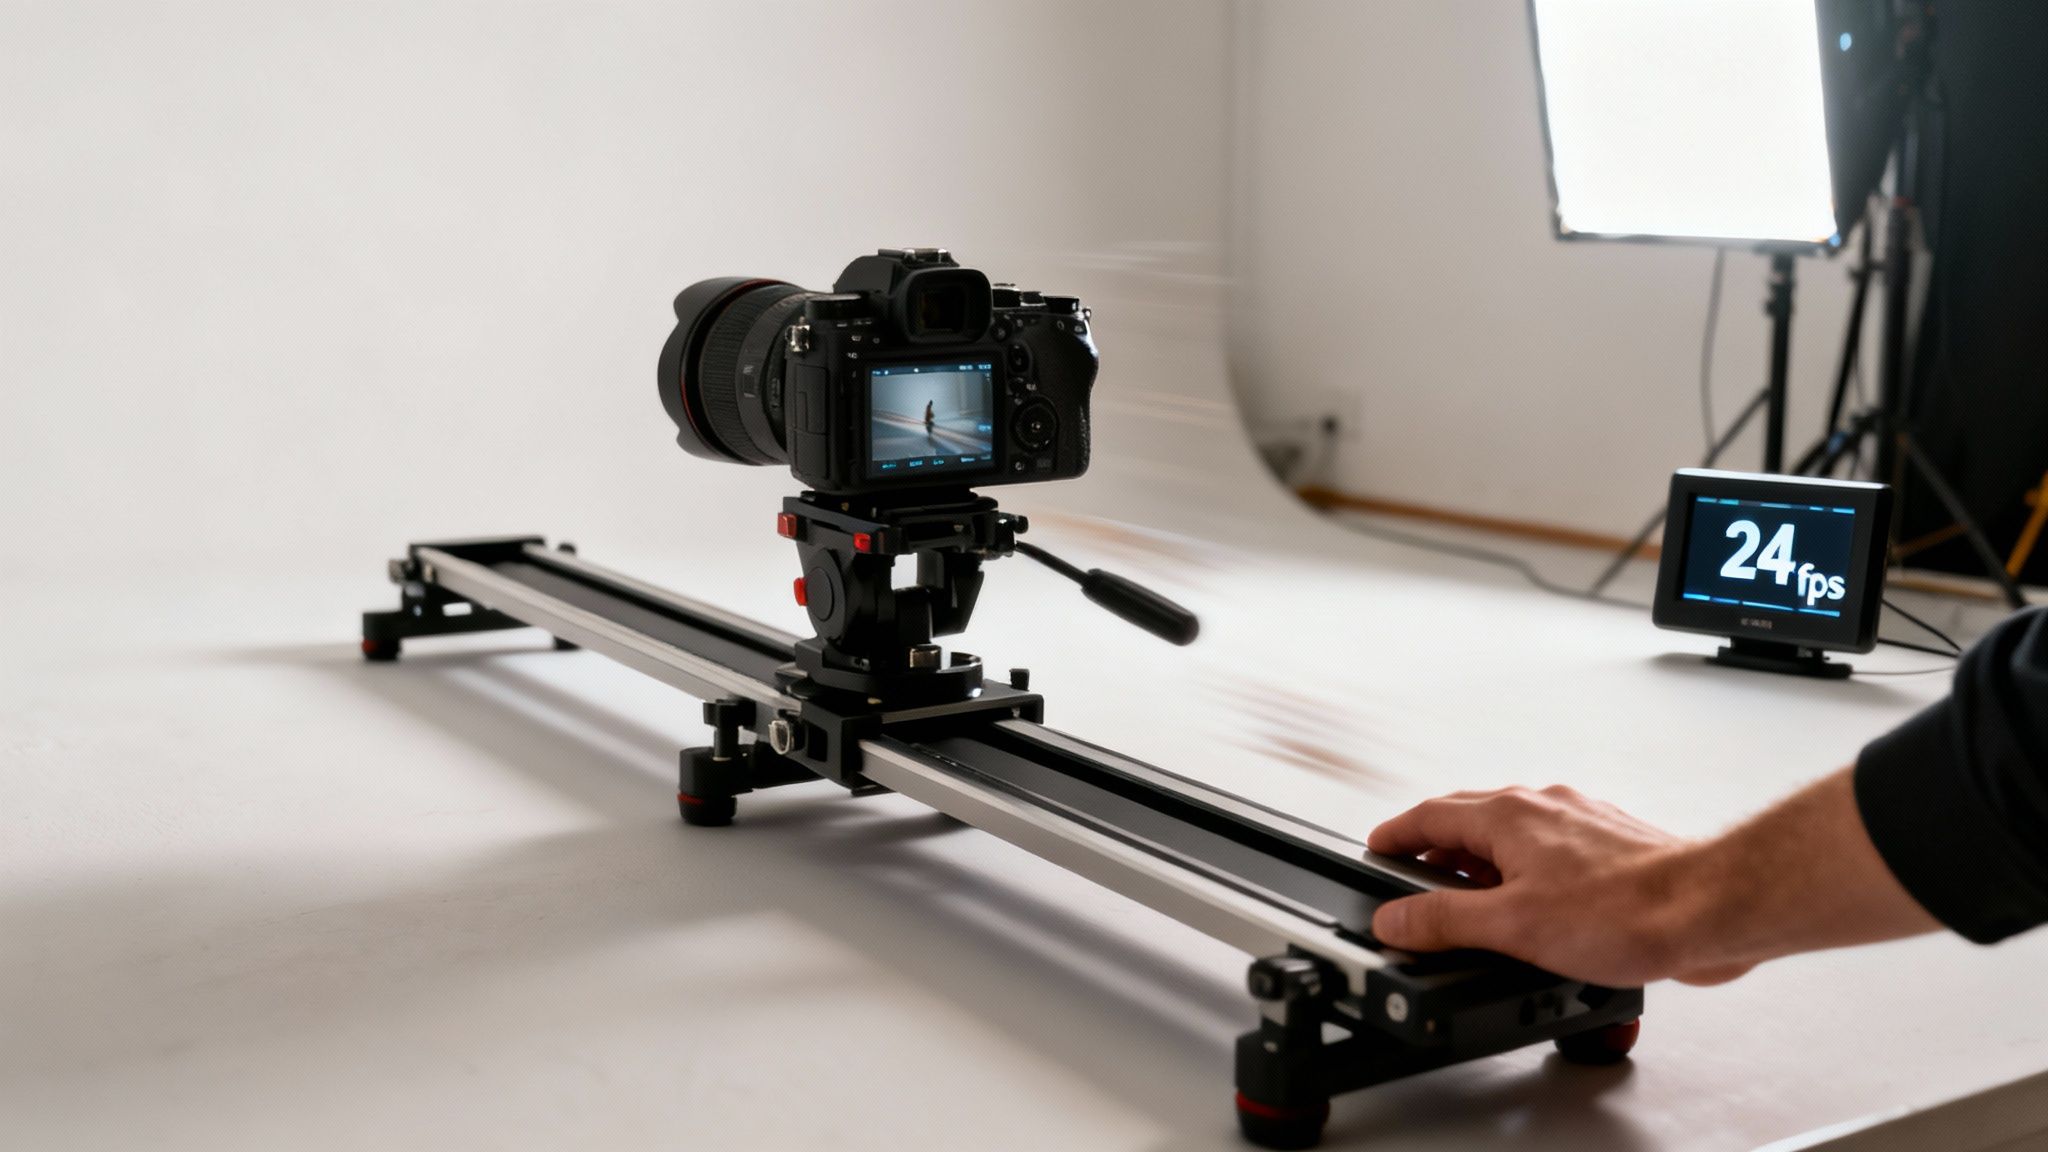
Beyond movement, a couple of key technical settings are non-negotiable if you want that authentic film look. These aren't just arbitrary rules; they're based on decades of filmmaking tradition designed to produce motion that looks natural and pleasing to the human eye.
First and foremost is your frame rate. The industry standard for movies is 24 frames per second (fps). Shooting at 24 fps gives your footage that slightly dreamy, smooth motion we instinctively associate with the cinema. Higher frame rates, like 60 fps, look hyper-realistic and are generally reserved for slow-motion effects or sports.
Working hand-in-hand with your frame rate is the 180-degree shutter rule. This classic guideline states that your shutter speed should be double your frame rate. So, if you're shooting at 24 fps, your shutter speed needs to be 1/48th of a second. Since most cameras don't have that exact setting, 1/50th is the one you'll use.
Following this rule creates the perfect amount of motion blur in each frame. If your shutter speed is too high, the motion will look jarring and choppy. If it’s too low, it'll be a blurry, smeared mess. Sticking to the 180-degree rule is one of the biggest and easiest technical steps you can take to make your videos feel genuinely cinematic.
The Art of Post-Production: Where Your Video Comes to Life
Shooting great footage is just the first step. The real magic, the part where a collection of clips becomes a story, happens in the edit suite. Post-production is where you take those raw puzzle pieces and assemble them, painting with color and sound to bring your cinematic vision to life.
A powerful edit is so much more than just slapping clips together in a timeline. It's about shaping the rhythm, crafting the mood, and building an immersive experience from the ground up. Let's break down the three pillars of any great cinematic edit: pacing, color grading, and sound design.
Finding the Rhythm with Pacing and Cuts
Pacing is the heartbeat of your video. It’s what controls the energy and flow, telling the audience when to feel the rush, when to pause for thought, and when to hold their breath. Getting the pacing right means your story unfolds in a way that just feels right.
Your main tool for controlling this rhythm is your cutting technique. A flurry of quick cuts can create a sense of action, urgency, or even chaos. On the other hand, letting a shot breathe for just a few extra seconds invites the viewer to soak in the atmosphere and connect on a deeper level.
A classic rookie mistake is cutting between shots that are too similar in framing. To keep the viewer hooked, you need variety. Try jumping from a wide establishing shot straight into a tight close-up, or from a static shot to one with dynamic movement. This approach, often called "cutting on action," keeps the eye moving and engaged.
Think of it like composing a piece of music. You need loud, intense moments balanced with quiet, reflective ones to create a truly dynamic experience.
Painting with Light: The Power of Color Grading
Color is pure emotion. It’s easily one of the most powerful—and subconscious—tools you have. Color grading is the process of manipulating the colors in your video to create a specific mood and aesthetic. It’s what gives professional films that distinct, polished look.
This goes way beyond just making colors "pop." It's about making deliberate stylistic choices. Want your video to feel warm and nostalgic? Lean into golden, amber tones. Going for a tense, futuristic vibe? Try pushing cool blues and desaturated greens into the shadows.
If you're just starting out, LUTs (Look-Up Tables) are a fantastic entry point. A LUT is basically a color preset you can apply to your footage with a single click. Many professional colorists sell LUT packs that mimic the look of classic Hollywood films, giving you a brilliant shortcut to a cinematic style.
Once you’re ready to get your hands dirty, you can start making manual adjustments:
- Contrast: Cranking up the contrast makes your whites brighter and your blacks darker, adding instant punch and drama.
- Saturation: This controls how intense your colors are. Interestingly, slightly desaturating your footage can often give it a more subtle, film-like quality.
- Temperature: Shifting your image toward warm (yellow/orange) or cool (blue/cyan) is a quick way to establish the overall mood.
Above all, aim for consistency. Your entire video needs to feel like it exists in the same visual world, and a consistent color grade is how you achieve that.
Building an Immersive World with Sound Design
Here's a truth every filmmaker knows: sound is at least 50% of the cinematic experience. Audiences will forgive slightly shaky visuals, but bad audio will rip them out of the story in a heartbeat. Great sound design works on an almost invisible level, making the world on screen feel real, tangible, and immersive.
This isn’t just about dialogue and a background music track. Real sound design is a carefully layered process.
- Foley and Sound Effects (SFX): These are the sounds that bring a scene to life—footsteps crunching on gravel, the clink of a glass, the rustle of a jacket. Adding these small details makes the world feel believable.
- Ambiance: This is the sonic texture of a location. Think of the low hum of a city at night, the chirping crickets in a field, or the quiet murmur of a library. Ambient sound grounds your scene in a physical space.
- Musical Score: Music is your emotional shortcut. A great score can instantly tell the audience how to feel, building tension, evoking sadness, or amplifying joy. The trick is finding music that complements the scene without overpowering it.
Finding the right track is non-negotiable. You need music that fits the mood and is properly licensed. Thankfully, platforms like Epidemic Sound and Artlist have made this incredibly easy. They offer huge libraries of royalty-free cinematic music from professional composers, so you can always find the perfect score to elevate your film.
Common Questions About Making Cinematic Videos
https://www.youtube.com/embed/_KImTKhy_mI
Even after you've learned the ropes, a few questions always seem to pop up when you're trying to nail that cinematic feel. Getting a straight answer to these common sticking points can make all the difference, letting you focus on what really matters: creating incredible videos. Here’s a breakdown of some of the most frequent questions I hear from aspiring filmmakers.
What’s the Single Most Important Element for a Cinematic Look?
If I had to pick just one thing, it would be lighting. No contest.
Good lighting is what separates a flat, amateur-looking shot from something that feels deep, moody, and professional. It’s not just about making sure your subject is visible; it’s about using light and shadow to sculpt the scene, create an atmosphere, and guide the viewer's eye.
Learning how to shape natural light or set up a simple three-point lighting rig will give you the biggest bang for your buck. Get the lighting right, and you're already 80% of the way to a cinematic image.
Lighting isn’t just a technical task; it's an artistic one. It tells the audience how to feel and can completely make or break the atmosphere of your scene.
Do I Really Need a Crazy Expensive Camera?
Absolutely not. This is one of the biggest myths in filmmaking, and it holds too many people back.
While a high-end cinema camera gives you more data to work with in post-production, the fundamentals of a great shot are the same no matter what you're using. These days, modern smartphones can shoot in 4K at 24fps and often give you manual controls over focus and exposure.
A well-composed, beautifully lit scene shot on an iPhone will always look more cinematic than a sloppy, poorly planned shot from a $10,000 camera. It's all about the artist, not the brush.
How Do I Pick the Right Music for My Video?
Music is the emotional engine of your video. The right track can elevate your story to new heights, but the wrong one can make the whole thing feel awkward or cheap.
Here's my thought process when choosing a score:
- What’s the Vibe? Before you even start searching, you need to define the mood. Are you going for hopeful, tense, epic, or nostalgic? This is your compass.
- Go Instrumental. Vocals can be distracting and often compete with dialogue or voiceovers. Instrumental tracks are usually a much safer bet for building atmosphere without pulling focus.
- Find a Song with a Story. Look for music that has its own arc—a beginning, a build-up, a climax, and an ending. You can align these musical beats with the key moments in your video for maximum impact.
- License Your Music. To steer clear of copyright headaches, always use royalty-free music from a reputable library. There are tons of great options out there, like Artlist or Epidemic Sound.
My best tip? Always drop a few potential tracks into your timeline and watch them with your footage. You'll know right away when you've found the one.
What Is the 180-Degree Shutter Rule?
The 180-degree shutter rule is a classic guideline that helps you create natural-looking motion blur. It's one of those subtle technical details that makes your footage feel smooth and professional instead of choppy or stuttery.
The rule is simple: your shutter speed should be double your frame rate.
So, if you’re shooting at the film standard of 24 frames per second (fps), your shutter speed should be set to 1/48th of a second. Most cameras don’t have that exact number, so you just use the closest one, which is usually 1/50th.
Following this rule creates a motion blur that looks very similar to how our own eyes perceive movement. It's a small tweak that makes a huge difference in how polished your final video feels.
Ready to stop planning and start creating? saro2 gives you the power to generate stunning, cinematic videos from simple text prompts, turning your creative vision into reality in minutes. Start creating for free today at saro2.ai.